June 10, 2024
Creating territories and areas in Vision is super easy, you can find out how to do that here. But making a good one is the next level of mastering your planning. This blog will give you some tips to make you a Vision pro and nail your project.
Step 1 – Make sure you’re using the right data
Vision gives you access to a wide range of data points, ranging from population and household demographics, business counts to detailed bespoke add-on packs such as the school locations or affluence indicators. Before you get started making your areas, you need to make sure you’re viewing the information that’s relevant to you.
For the area being created, most Vision users will want to know either:
- How many potential customers there are
- How many existing customers or sales were made
- Or both
When thinking about your customers, what data best describes them? Are you selling cleaning services, if so, then household and affluence demographics are right for you. Or you might also have a commercial cleaning offering, in that case bring in the business counts too. There’s no point overwhelming your brain with hundreds of data points that aren’t useful. So, get rid of any data that ultimately isn’t that relevant to you.
You can use this Help Centre article to help you organise what data you want to see and for which layers.

Step 2 – Are you using the right geography?
When choosing the right geography you need to think about your stakeholders. For most businesses, creating areas using Postal geography is the right choice. This is because many businesses rely on Postcodes to help them assign customers to the right branch, rep, technician or store. It’s also often the easiest for all stakeholders to understand when sharing the area with them.
If you are using Postal geography, did you know there are multiple “levels” of a Postcode? This varies from country to country but usually there is a lowest level available that will provide the most granular information.
There might be some occasions where the Postal geography isn’t right for you. Perhaps you do a lot of public sector work and the administrative geography is better suited to your project. For example, this could be counties, local authorities or municipalities.
The final tip, don’t default to what YOU know. In your mind, it might be really obvious that an area should just be “that” city, “those” towns or “this” region. All of those terms are very ambiguous and whilst you might have an idea of where a city limit ends, this could be very different to someone else.

Step 3 – What is the purpose of your area?
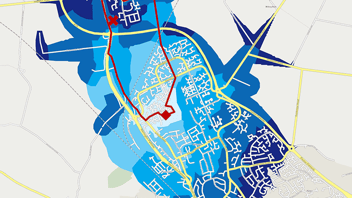
Be specific but also think about the simple factors around what you are actually making the area for. Are you making an analysis area to determine the potential in an area? If so, how are you going to reach those customers or vice versa? Don’t make your area with a 2 hour drive time across it if your engineer can realistically only travel 30 minutes between appointments. If you make it too big then you will misrepresent the opportunity and the viability of the area.
The same goes for if you are figuring out whether to place a new store or branch. Realistically how far are customers going to travel to reach you?

Step 4 – Take into account the roads and topography
The final tip, look at what’s inside the area you’re making. Is it realistic to be serviced? A simple example, and one that is easily overlooked, do you have a river in your area but there’s no bridge? If so, any of the population, household or business counts you're looking at on the other side of the river can’t realistically be serviced. So they shouldn’t be included in your planning.

If you think about these 4 tips for your project you’ll get substantially better results. And if you’re trying to make more than one area, or you’re setting up a long-term geographic growth plan, then perhaps you’ll want to talk with our team. We can support you with bespoke data-driven project work to do all of the heavy lifting. The network of your dreams could just be one conversation away. Come chat with us here.


